Tuesday, December 30, 2008
Little Purple Angel Piggie
Sunday, December 28, 2008
Friday, December 12, 2008
Harugurumi Store Front!!!
For my little st
I spent two weeks to create my first amigurumi Christmas tree
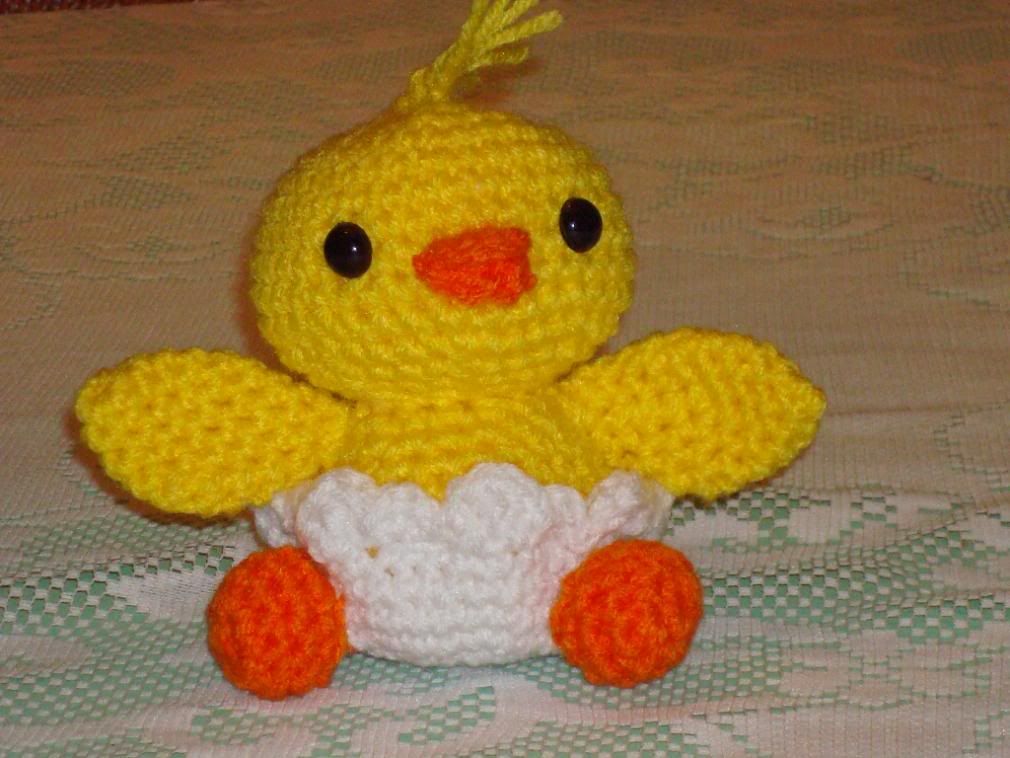
and this time I would like to introduce my little chicks to the christmas party~!
looks good actually, I saw some children are so excited when they look at my works,
feeling goooooood :D
If you're living in Toronto, or will be visiting Toronto, please come and check it out!
Address:
gagoo box
Pacific Mall E31
4300 Steeles Avenue East
Markham, ON L3R 0Y5
Thanks!!!
Tuesday, November 18, 2008
A cup of Latte Free Pattern
Cup [colour: Your Favorite Colour]
A) Bottom
Rnd 1: 7 sc in a ring (7)
Rnd 2: 2 sc in each st around (14)
Rnd 3: *sc in next st, 2 sc in next st* around (21)
Rnd 4: *sc in next 2 st, 2 sc in next st* around (28)
Rnd 5: *sc in next 3 st, 2 sc in next st* around (35)
Rnd 6: *sc in next 4 st, 2 sc in next st* around (42)
Rnd 6: *sc in next 5 st, 2 sc in next st* around (49)
B) Body
Rnd 1: Ch 49, form a ring (49)
Rnd 2-13: Sc in each st around (49)
C) Ear
Rnd 1: 7 sc in a ring (7)
Rnd 2-18: sc ineach st around (7)
D)Latte [Colour: I used Red Heart Super Saver Yarn - Sandy Print]
Rnd 1: 7 sc in a ring (7)
Rnd 2: 2 sc in each st around (14)
Rnd 3: *sc in next st, 2 sc in next st* around (21)
Rnd 4: *sc in next 2 st, 2 sc in next st* around (28)
Rnd 5: *sc in next 3 st, 2 sc in next st* around (35)
Rnd 6: *sc in next 4 st, 2 sc in next st* around (42)
Rnd 7: *sc in next 5 st, 2 sc in next st* around (49)
Rnd 8: Sc in each st around (49)
Put some of your favorite roasted coffee beans inside a piece of cheese cloth. and put it inside the fibrefill.
Your coffee lover friend will give you a kiss :)
Wednesday, October 15, 2008
Thanksgiving!!
thank you thanksgiving hahaha...
I finally can put all my thoughts together...
October Bride
I have tried a new way to make the dress...
pretty good I think
This time I have added a little necklace, actually I think it is a great idea for giving out jewelery on a doll like this as a package (like this one a bracelet can be her necklace).
pretty sweet stuff :)
Friday, July 25, 2008
Wednesday, July 16, 2008
Amigurumi Heart Pattern
and there was alot of things going on last few weeks...so tiring... >_<
link to get your heart :)
Share your love to the world!
Tuesday, June 10, 2008
I'm not disappearing!!
recently I just had my new job, and I had my convocation yesterday!! wow! :D
I'm officially graduated!! yeahhhhh :D
even though I'm so busy with starting my new page of life, I still crochet hhaaha :P
don't worry I'm not disappearing!
These are my recent project...
Bear and Bunny couple :D
I really satisfied with her dress :D
more coming soon.....:)
Sunday, May 11, 2008
I'm BACKKKKKKKKKKKKK
yeahhh :D
had a great trip to the Cuba, Varadero!!
loooooooooved the beach and sun there, I'm tanned!! wowhoo!! XD
so now I'm ready to pick up my hook again hahaha!!
feelin' gooooooooooood!!
Monday, April 21, 2008
3 sleeping baby sheep :D
Sunday, April 13, 2008
Battle Starts!
it's almost the end of my school life I'm so excited
having my exams until the 25th...
so I'll be extremely busy on studying and I may update my blog slowwwwly...
however in my mind I already have some plans on pattern writing and making new stuff after the exam...and my grad trip!! yeahhhhhHHHH!!
Stay tune! :))
Project update!
my project (2 baby sheeps) is doing great right now,
I hope their new owners will love them! :)
Thanks!
back to study now! c ya! :D
Sunday, March 23, 2008
This is from Maureen (original post @ crochetville)
Thanks again for purchasing the pattern :)
you made it so adorable! love it :D
have been busy over the weekend...
hope everyone had a great easter holiday!
Tuesday, March 18, 2008
Easiest Amigurumi Easter Chick - Pattern
Materials:
- Medium weight yarn (yellow, orange and white)
- Felt (dark colour)
- Fiberfill
- Yarn Needle
- Blush from your makeup box (or other powder colouring)
Hook:
- US H8 (5mm)
Finished Size:
- Height: 2.25 inches (5.7cm), with rabbit ear straight up: 3.75 inches (9.5cm)
- Width: 1.75 x 1.75 inches (4.5 x 4.5cm)
Body [Colour: yellow]
Rnd 1: 7 sc in a ring (7)
Rnd 2: 2 sc in each st around (14)
Rnd 3: *sc in next st, 2 sc in next st* around (21)
Rnd 4: *sc in next 2 st, 2 sc in next st* around (28)
Rnd 5-9: sc in each st around (28)
Rnd 10: *dec, sc in each of next 2 st* around (21)
Rnd 11: sc in each st around (21)
(Stuff fiberfill)
Rnd 12: *dec, sc in each of next 1 st* around (14)
(Stuff more fiberfill if needed)
Rnd 13: *dec* around (7)
Closing up
Beak: [Colour: orange]
Rnd 1: 7 sc in a ring. (7)
Rabbit Ears: [Colour: white]
Rnd 1: 6 sc in a ring (6)
Rnd 2-5: sc in each st around (6)
Make 2
Rabbit Ears Base: [Colour: white]
Foundation chain: Ch 7,
Row 1: Sc in 2nd then sc in each sc across (5). fasten off.
Assembly:
- fold the beak in half and sew the folded side onto the body.
- Cut felt into two circles and glue onto the body beside the beak
- you can also embroider the eyes with yarn or using buttons.
- Embroider feet on the body.
- Sew rabbit ears to the base, and then sew it on the head.
- Using blush or colouring to colour the ear (optional)
You can also make other accessories other than rabbit ears, or no accessories at all.
and you can make them with a different characteristic with different size of eyes and/or feet size.
have a fun easter! :D
Easter Break!
I finally finished two of the most important assignments of the year.
I have a little break before I have another battle...
I'm so excited to show off my easiest easter chick...
they only take 30mins (or less!) to make!
perfect for anyone who has tight schedule like me! haha! :P
(I'll post the pattern in the next post.)
I made three of them in total...love them...
took so many photos for them...
Photoshoot with my tomatos :)
I took this one randomly without looking into the lens....surprisingly cute!! :D
Friday, March 14, 2008
I'm the proud mama! :D
awwww....how sweet! :)
from Cecile - a very nice and talented crafter from Flickr (link to her flickr site)
She is the first person who motivated me to my first step of pattern writing :)
Thank you very much Cecile, without you, my little sheep would be so lonely right now!
heheee~
School work is killing me again...
I'll be back on Tuesday :) wish me luck!
Wednesday, March 12, 2008
First Pattern for Sale!
I made it finally...my first pattern for sale! yaY! :D
You can get it here
I spent so much time on the layout planning...
yes I'm a perfectionist :P
I hope my baby chick will be as popular as my little sheep...heehee :)
Sunday, March 9, 2008
gosh what's going on?? :(
I hate too much snow...
After a battle-like week, finally I have a little break, I can finally sit down and make my babies...
look at my messy messy work station (dinning table)!!
I have been working on several projects...
my bubble pet series and easter goodies...
Usually I don't like to stick with one project,
Sometimes I have too many ideas then I like to work on several projects at the same time.
Kinda funny eh? :P
Play around with my camera when I'm bored.
This little light is from Ikea...I have all 3 of them...sooo cute :D
Finally it's done!
My easter baby chick :D perfect hanging toy for Easter!
available at Etsy tomorrow!! (I'll put it up after my classes...:/)
Wednesday, February 27, 2008
busy...........
wow almost can't breath! x_x
I got my feedback for my first sale on Tuesday...
I'm glad that she likes it :)
thanks again!
Although I'm so busy...I will still work on my projects when I need a break
and share updates with you guys
There are soooo many talented amigurumi makers around us!
I got an group invitation from flickr today...
Amigurumi Animal
pretty cool, I love to look at other people's creations, they all got different character even though they were from the same pattern. (Actually it is very difficult to see two very similar creations! Mostly everyone has their own "recipe") ^_^
love it love it love it~
ok, time to work... >_<
bye for now
Friday, February 22, 2008
Baby Sheep Free Pattern
some of my friends asked me if I can give the pattern to them...
I never learn how to write a crochet pattern so it's a tough mission for me...
So, this is for you all, my first written pattern
I hope they will work out well :)
Sleeping Baby Sheep
Materials:
- Worsted weight yarn (gray and white)
- A little bit of black and white yarn for eyes and nose
- US J10 and L11 hook
- fiberfill
Head: (I used L11 hook) [Colour: white]
Rnd 1: 7 sc in a ring (7)
Rnd 2: 2 sc in each st around (14)
Rnd 3: *sc in next st, 2 sc in next st* around (21)
Rnd 4: *sc in next 2 st, 2 sc in next st* around (28)
Rnd 5: *sc in next 3 st, 2 sc in next st* around (35)
Rnd 6: *sc in next 4 st, 2 sc in next st* around (42)
Rnd 7: *sc in next 5 st, 2 sc in next st* around (49)
Rnd 8-10: sc in each st around (49)
Rnd 11: *dec, sc in each of next 5 st* around (42)
Rnd 12: *dec, sc in each of next 4 st* around (35)
Rnd 13: *dec, sc in each of next 3 st* around (28)
Rnd 14: *dec, sc in each of next 2 st* around (21)
Rnd 15: *dec, sc in next st* around (14)
Body (L11 hook) [Colour: white]
Rnd 1: 7 sc in a ring (7)
Rnd 2: 2 sc in each st around (14)
Rnd 3: *sc in next st, 2 sc in next st* around (21)
Rnd 4: *sc in next 2 st, 2 sc in next st* around (28)
Rnd 5: *sc in next 3 st, 2 sc in next st* around (35)
Rnd 6-9: sc in each st around (35)
Rnd 10: *dec, sc in each of next 3 st* around (28)
Rnd 11-13: sc in each st around (28)
Rnd 14: *dec, sc in each of next 2 st* around (21)
Rnd 15-17: sc in each st around (21)
Rnd 18: *dec, sc in each of next st* around (14)
Rnd 19: sc in each st around (14)
Arms and Foot (J10 hook) [Colour: gray]
Rnd 1: 7 sc in a ring (7)
Rnd 2: 2 sc in each st around (14)
Rnd 3-8: sc in each st around (14)
Rnd 9: *dec, sc in each of next st* around (9)
Rnd 10-12: sc in each st around (9)
(Make 4 pieces)
Ears (J10 hook) [Colour: gray]
Rnd 1: 7 sc in a ring (7)
Rnd 2: 2 sc in each st around (14)
Rnd 3-9: sc in each st around (14)
(Make 2 pieces)
Face (J10 hook) [Colour: gray]
Rnd 1: 7 sc in a ring (7)
Rnd 2: 2 sc in each st around (14)
Rnd 3: *sc in next st, 2 sc in next st* around (21)
Rnd 4: *sc in next 2 st, 2 sc in next st* around (28)
Rnd 5: *sc in next 3 st, 2 sc in next st* around (35)
Rnd 6: *sc in next 4 st, 2 sc in next st* around (42)
Rnd 7: *sc in next 5 st, 2 sc in next st* around (49)
Assembly:
- Sew the eyes and nose on the face
- Stuff the head with fiberfill (I stuffed more fiberfill in the head to make some weight)
- Sew the face on the head
- Stuff just enough fiberfill into the tummy (leave the neck, we don't need any filling here, this is how we make it look "sleepy" :))
- Stuff just a little to the arms and foot, leave the opening free of filling
- Do not stuff the ears, sew them to the head
- Sew all the arms and foot on the body
- and Finally, attach the head to the body
TA-DAA!! :D
If you have any trouble or questions on this pattern, please let me know.
Please also leave me a comment if you have tried this patter, either you like it or not. :)
Thanks!!
Happy crocheting!
Wednesday, February 20, 2008
Amigurumi Heart Keychain
Get one for your loved ones!! :D >>click here<<
I enjoy making amigurumi hearts these days :)
The complete set: a heart delivery bunny :)
Love you all my babies ^3^)
**see the sofa is too full already!** hahahaa...
First Order
I'm so happy, nothing is better than making a sale! heheeee
My first order is....the little cactus!
- My work station, little cactus has no eyes and mouth yet. The other one is my original one as a sample.
Done! little cactus is born!! TA-DAAA! :D
Aren't they so cute?!
Thanks again for
adopting me!!!
I'll be a good girl...